

How To Draw Stairs From The Side
Architectural structures is a mutual subject in many artworks, and drawing is no exception.
If you'd similar to depict a building or a house, the key is to learning how to draw its key features first, like the stairs, for instance.
To arrive a lot easier for y'all, we take created a step-past-step tutorial on how to draw stairs.
This guide consists of 9 easy instructions that come with simple illustrations to serve equally your visual guide as you follow the steps one by one.
Have fun and use your creativity to depict stairs!
What'due south in this Weblog Mail
- How to Depict Stairs — Let'south get started!
- Step 1
- Stride two — Draw the First Two Treads of the Stairs
- Step 3 — Next, Draw the Third Tread of the Stairs
- Footstep four — Then, Add Another Tread on the Stairs
- Footstep 5 — Structure the Fifth and the Last Tread
- Step 6 — Subsequently, Draw the Stairs' Stringer
- Stride 7 — Create the Primal Pole of the Stairs
- Step 8 — Adjacent, Draw the Hand Rail for Back up
- Step 9 — Add the Balusters in Between the Newels
- Your Stairs Cartoon is Complete!
How to Depict Stairs — Allow's go started!
Stride 1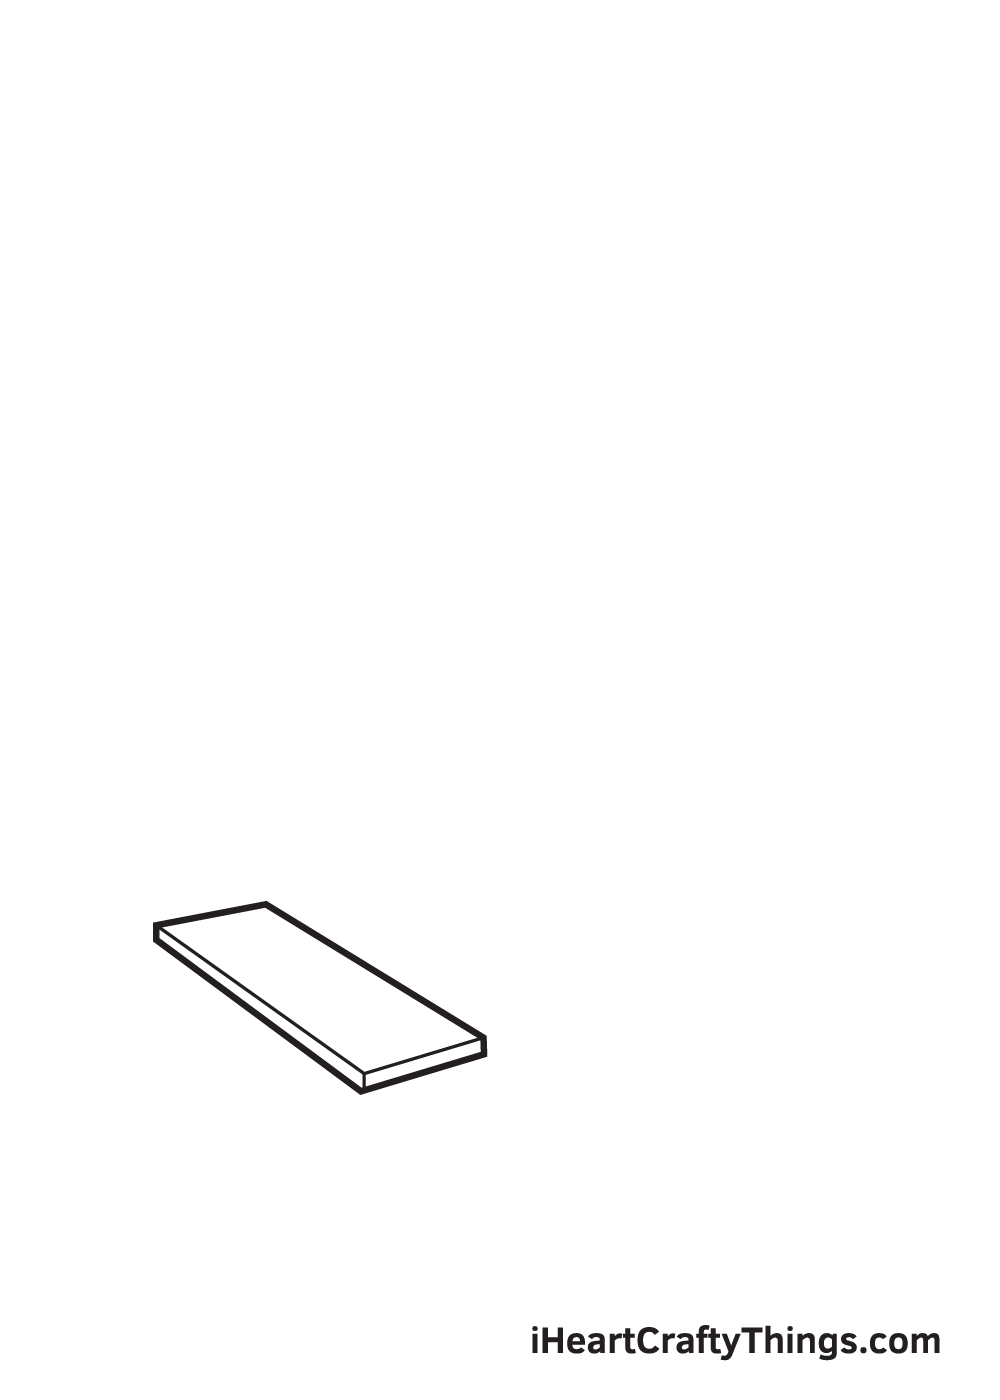
Nosotros'll be cartoon the stairs from the ground upward, meaning we'll begin from the lowest tread then piece of work our way upwards to the highest tread.
Start by drawing a diagonal parallelogram shape on the lower left side of your paper. This forms the first tread of the stairs.
Don't forget to add a line on the bottom and on the right side border of the pace. This adds a dimension on the treads to make it announced 3D and realistic.
Retrieve to keep doing this on all the treads you will be drawing in the following steps.
Step 2 — Depict the First Two Treads of the Stairs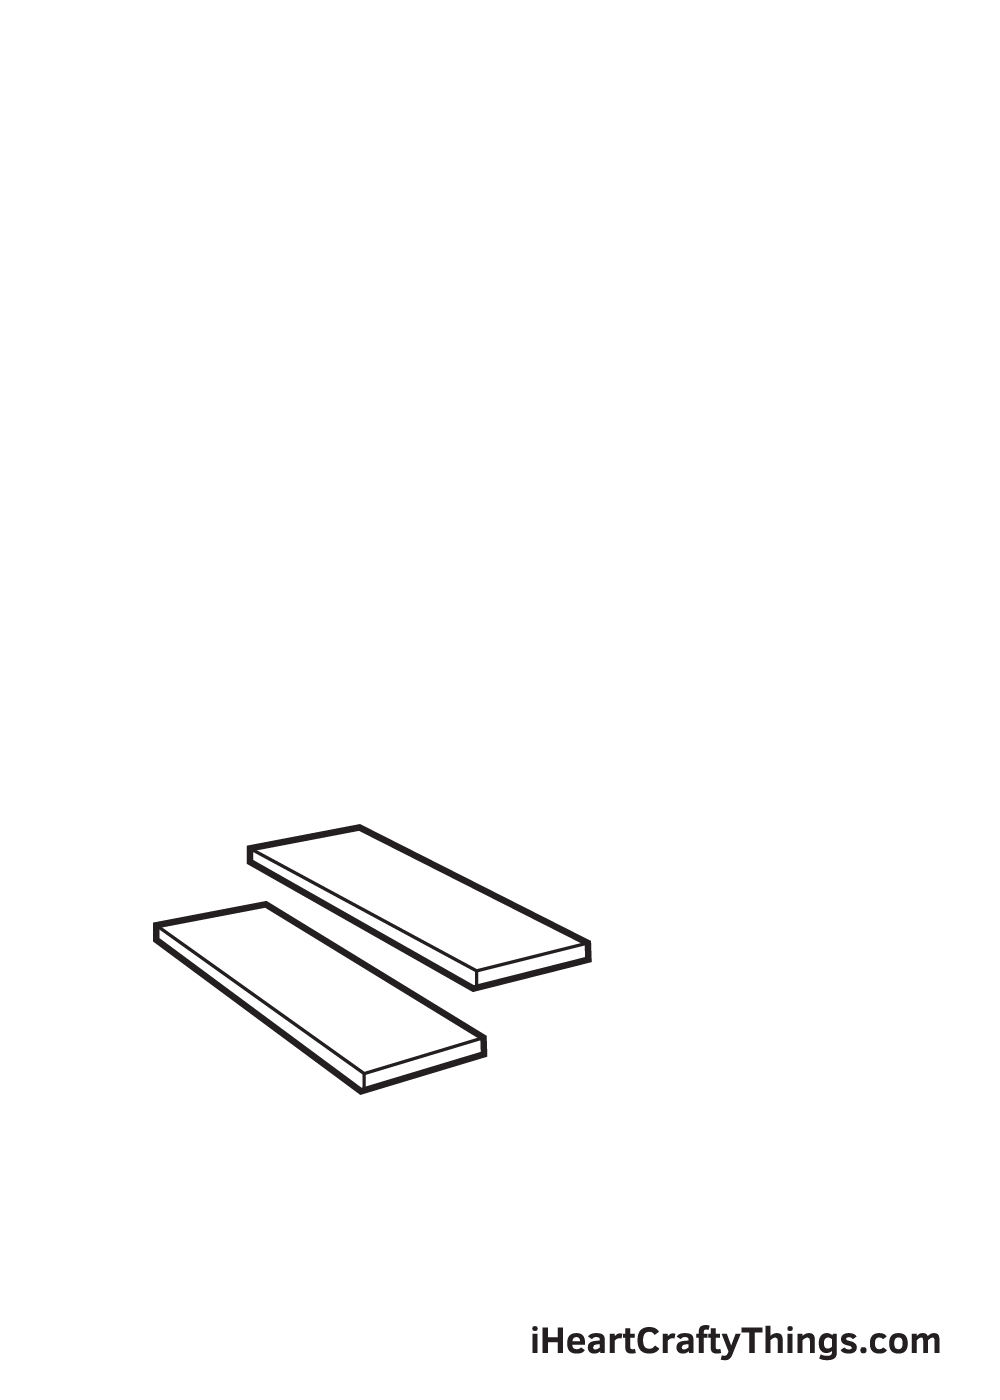
Draw another tread one stride college than the commencement one nosotros drew in the previous step. Proceed in heed that this tread should not be directly above the kickoff tread, but it should exist slightly on the right side.
Later on finishing this step, the stairs should now have 2 treads starting from the ground.
Stride 3 — Next, Draw the Third Tread of the Stairs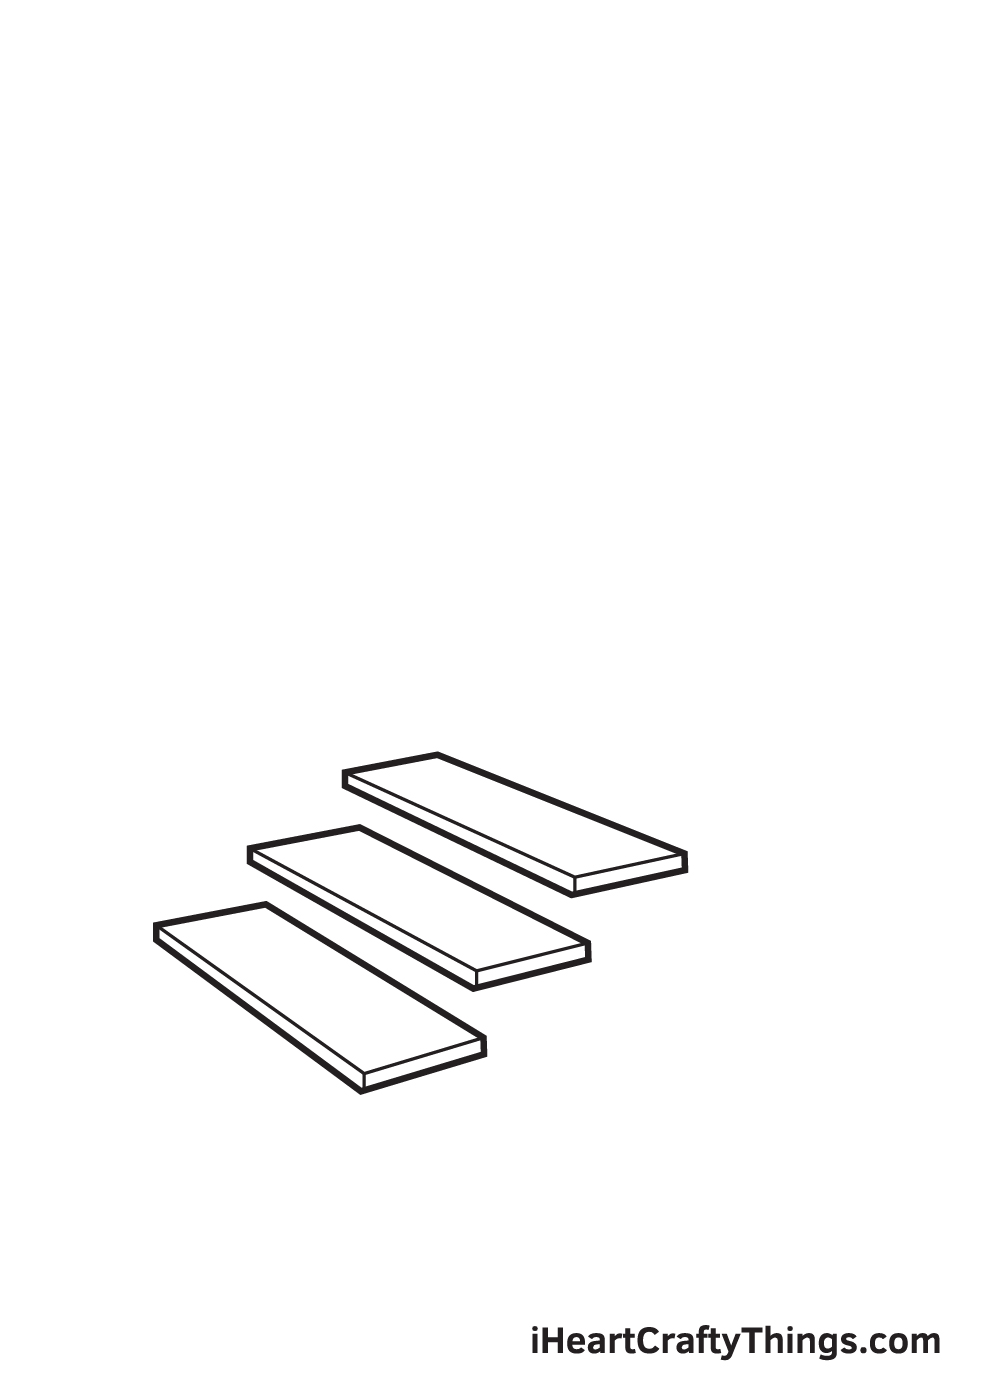
Repeat the previous step to create the tertiary tread 1 stride higher from the 2nd tread. Now, the stairs have iii steps. Nosotros're most there—go along going!
Keep in mind that all treads should accept a similar shape and size. The only deviation should be the spot where they are positioned.
Step iv — Then, Add Another Tread on the Stairs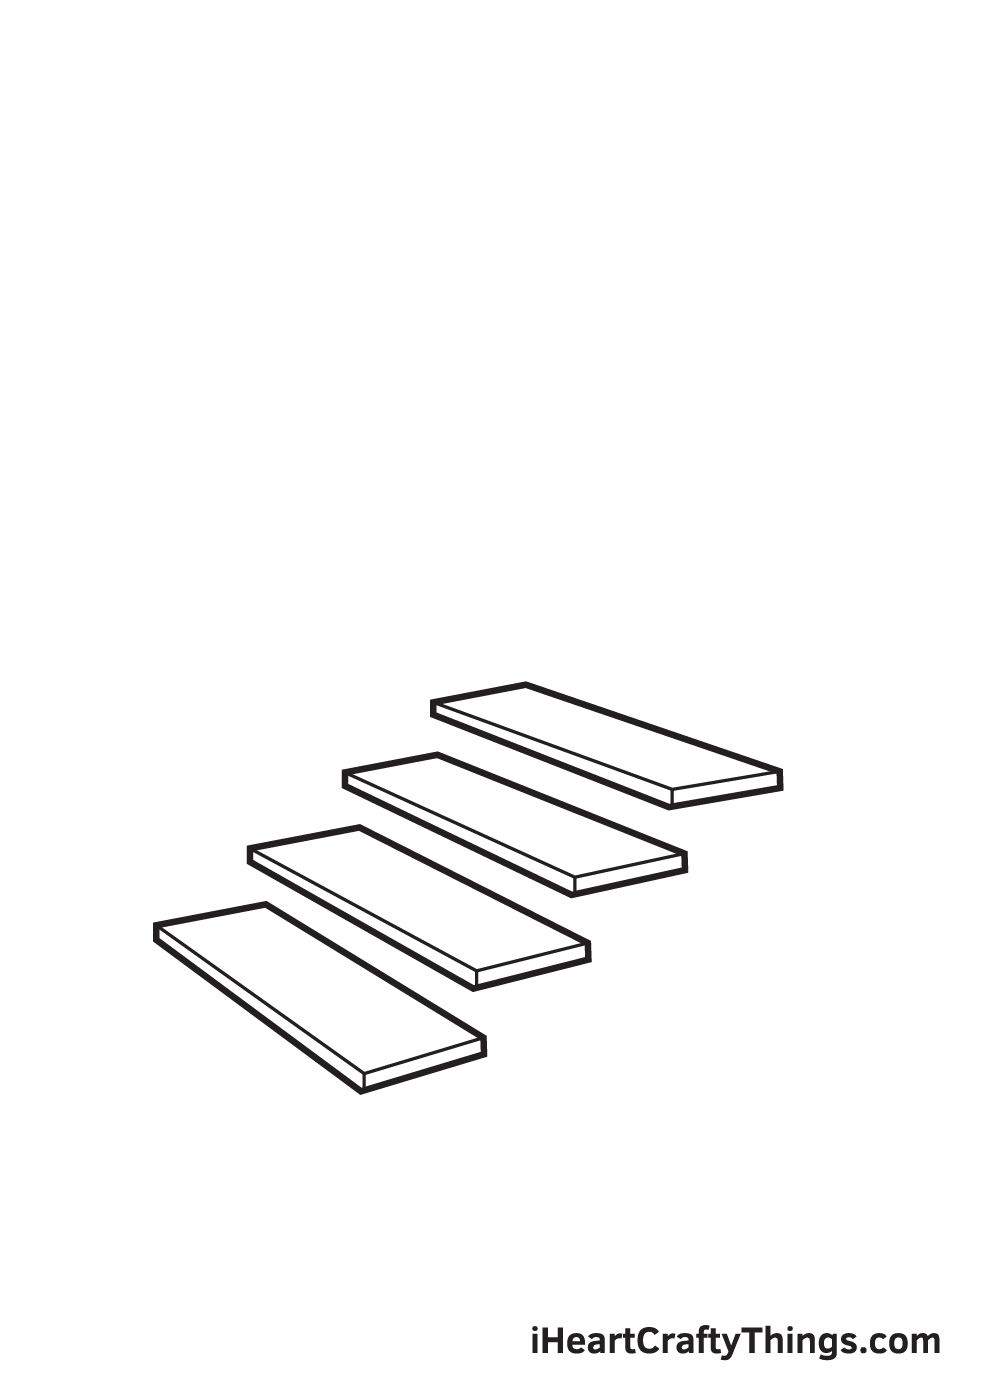
Draw another diagonal parallelogram shape 1 step higher from the 3rd tread.
This creates the quaternary tread of the stairs. At present, we're simply missing one tread to complete the steps of the stairs.
Stride 5 — Structure the Fifth and the Last Tread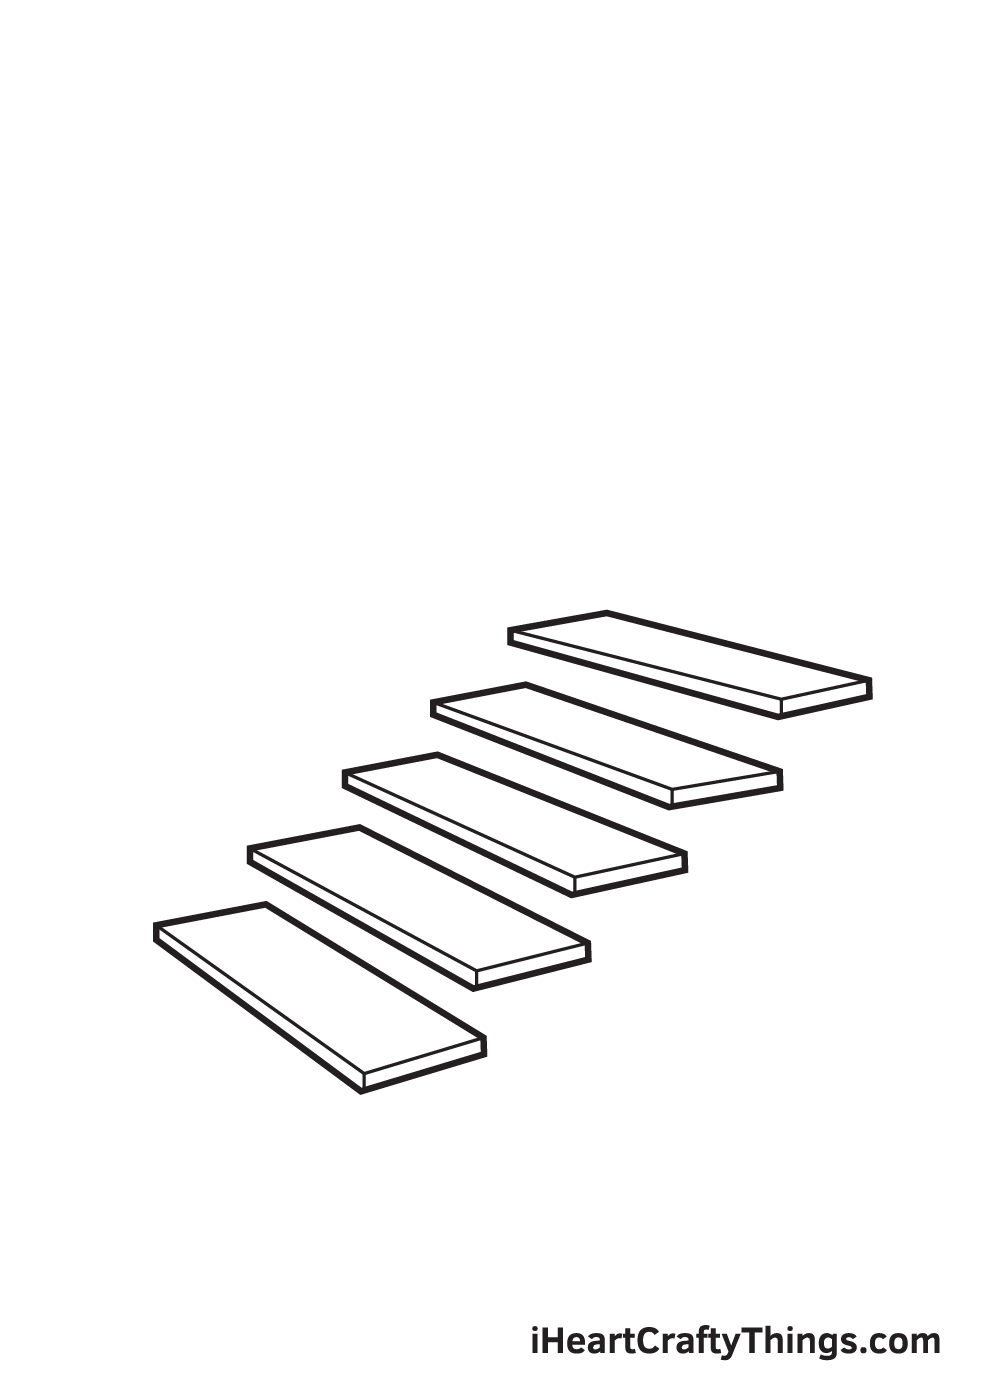
Repeat the previous step to grade the highest tread in the stairs. At this point, you lot should now take a total of 5 treads in the stairs.
Remember, the steps should exist forming an upward diagonal heading to the right side.
Brand sure that all treads have thin lines on their bottom and right edge. This adds a iii-dimensional effect on the stairs, as mentioned in the previous steps.
Step 6 — Afterwards, Draw the Stairs' Stringer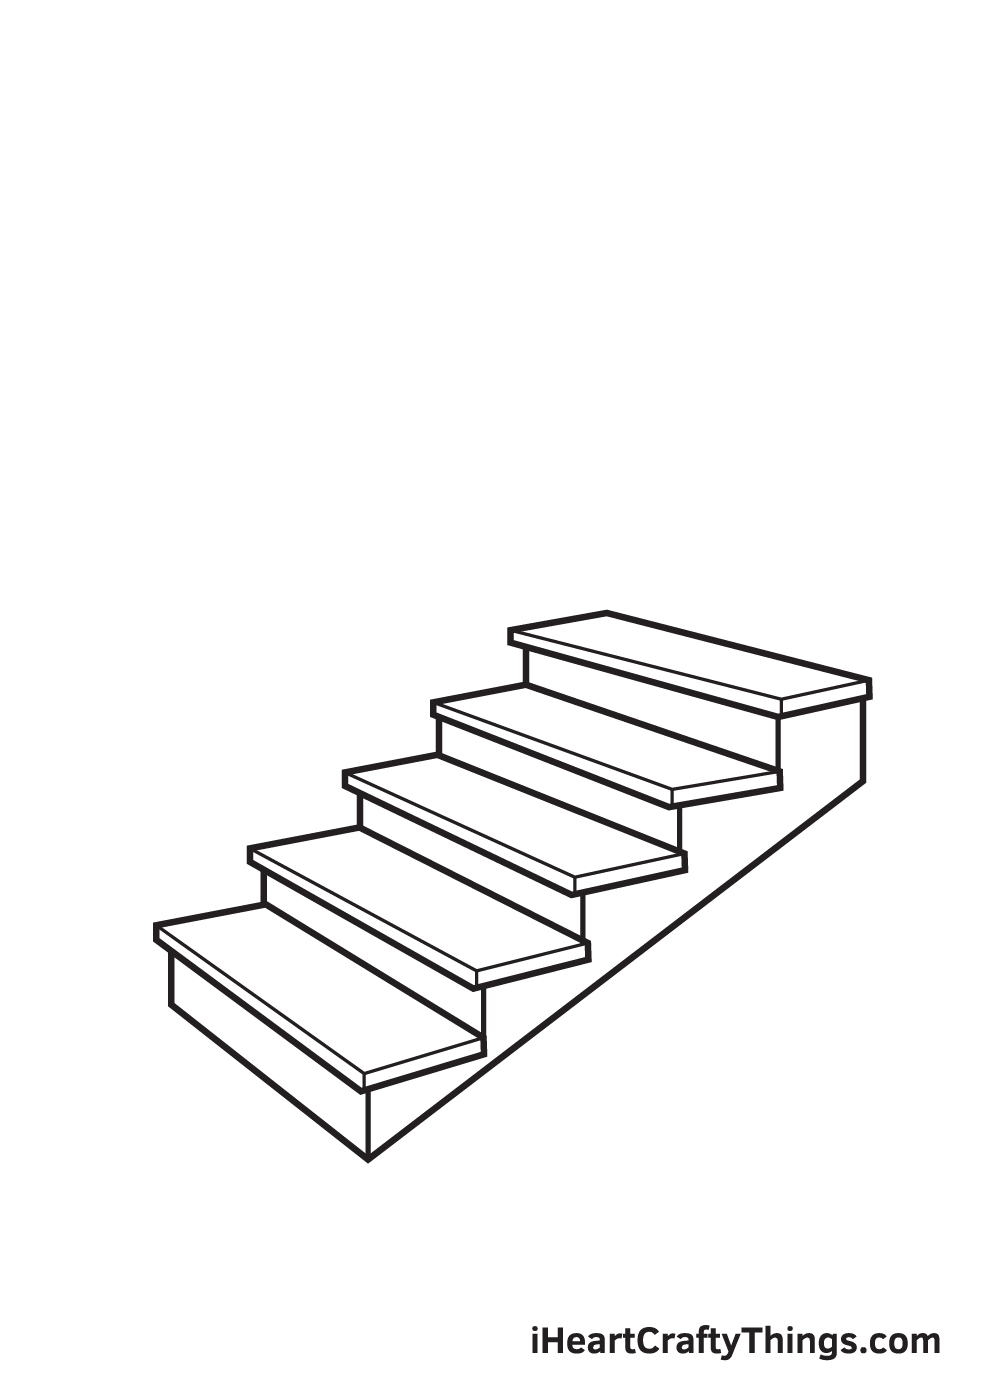
Draw a diagonal shape right underneath the flying of stairs. This forms the stringer, which serves as the foundation of the steps.
Subsequently, draw vertical lines on the corner edges of each tread. This connects all the steps together, magnifying the structure of the stairs.
Footstep 7 — Create the Central Pole of the Stairs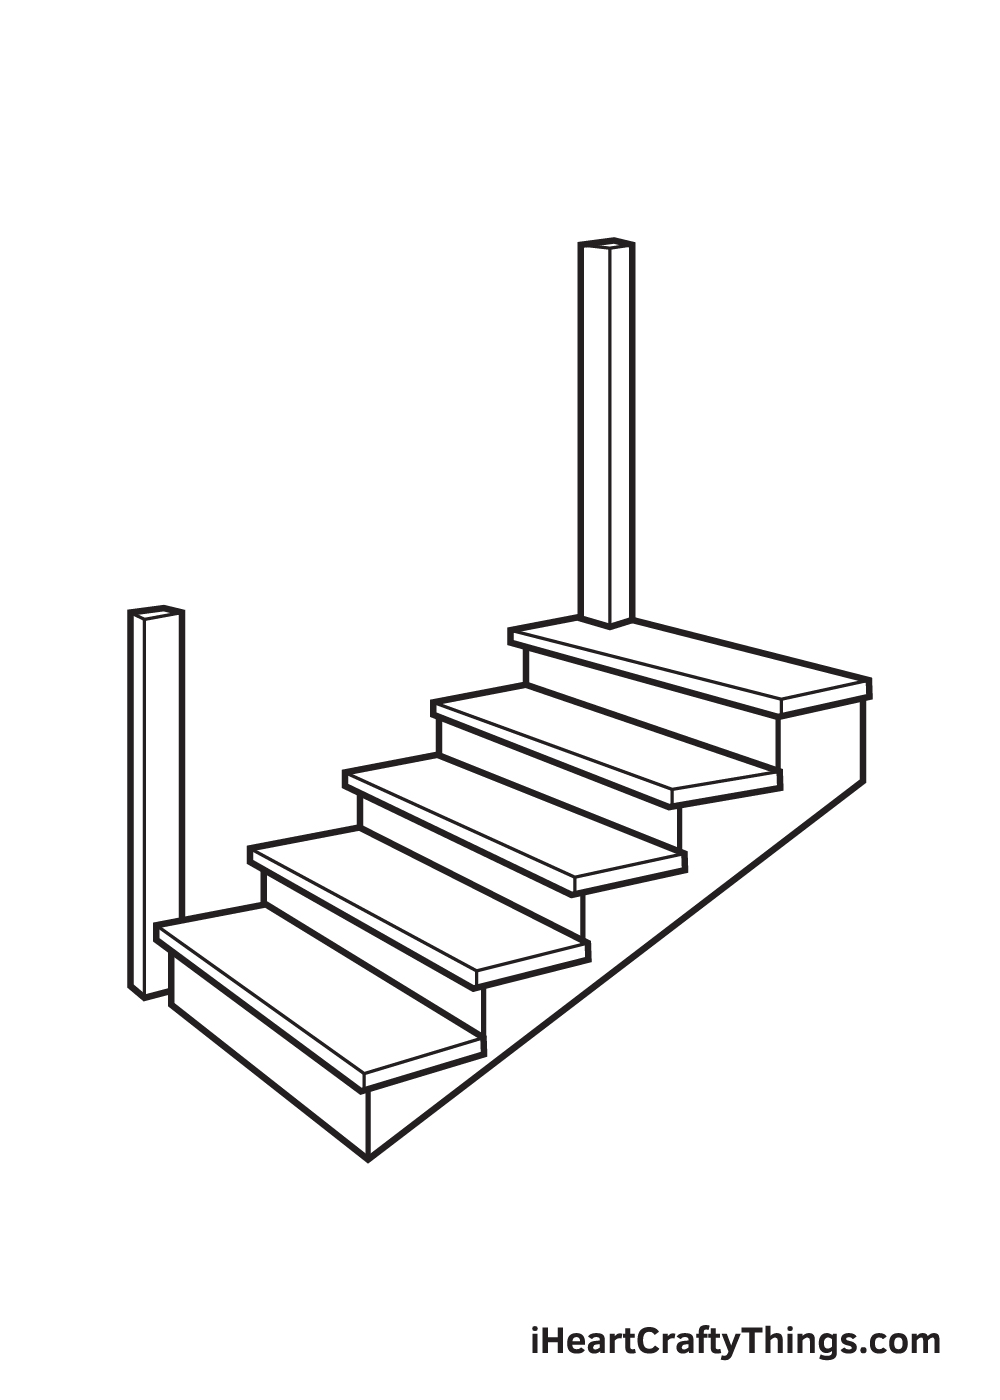
Draw a pole beside the everyman tread and some other one atop the highest tread. This creates the central pole or the back up cavalcade, which serves equally the cardinal supporting pillar of the stairs.
Go on in mind that the central poles should be about an inch and a half alpine. As well, don't forget to add lines downwardly the length of the poles to create dimensions!
Step 8 — Side by side, Draw the Hand Rail for Back up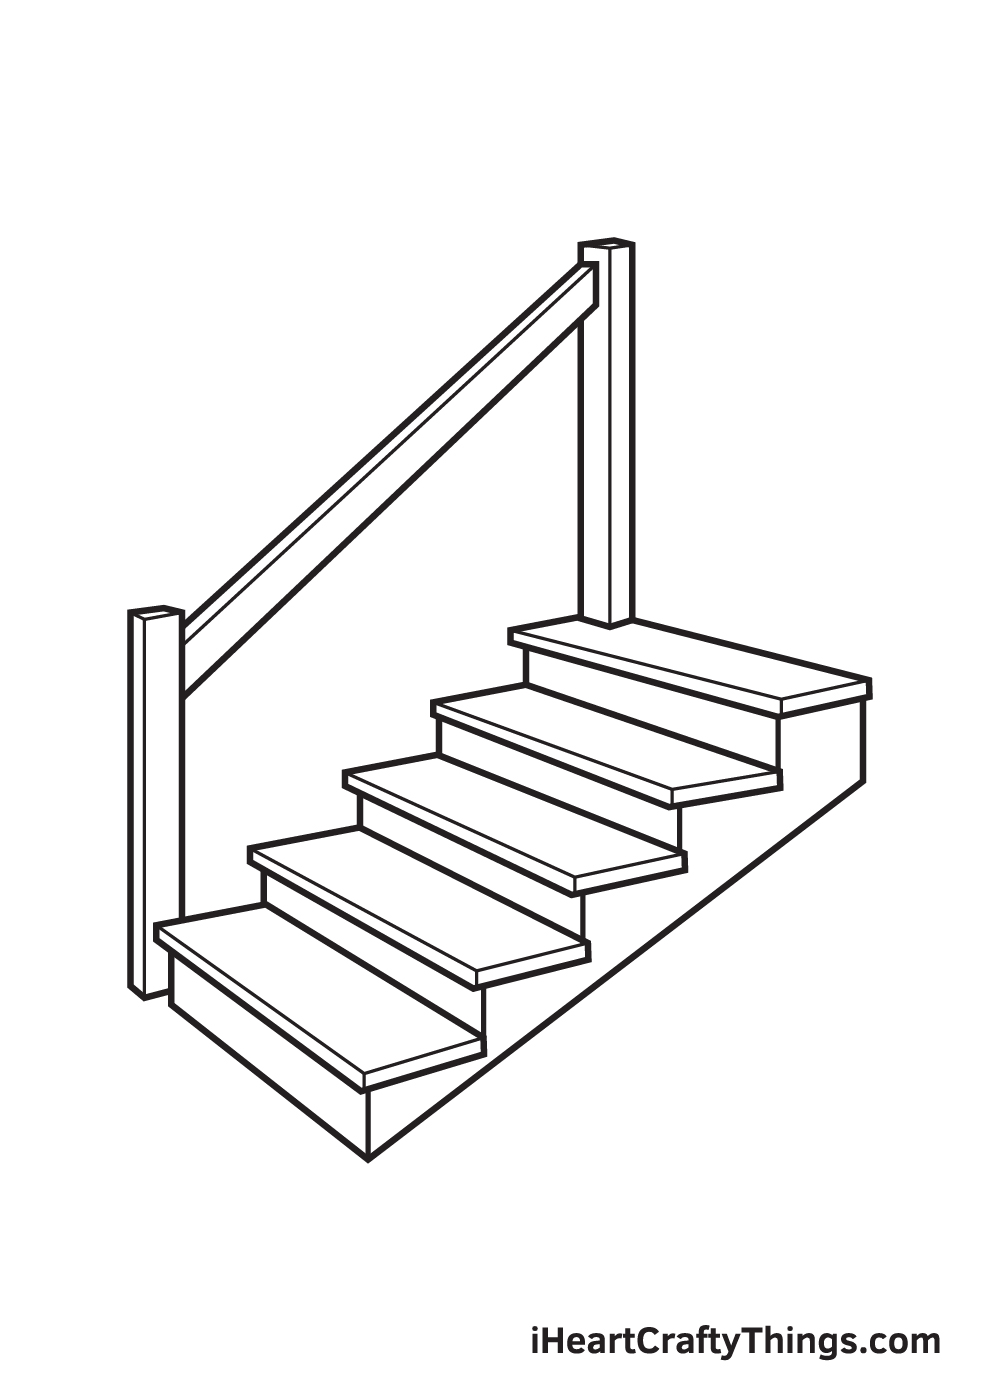
Depict an upward diagonal shape attached to the elevation part of both cardinal poles. This creates the mitt rail, which is what people usually hold on to for support when walking up and downwardly the stairs.
Make sure to add a thin line across the length of the mitt runway nigh its upper edge. Like to the other parts of the stairs, this creates a iii-dimensional event.
Step ix — Add the Balusters in Between the Newels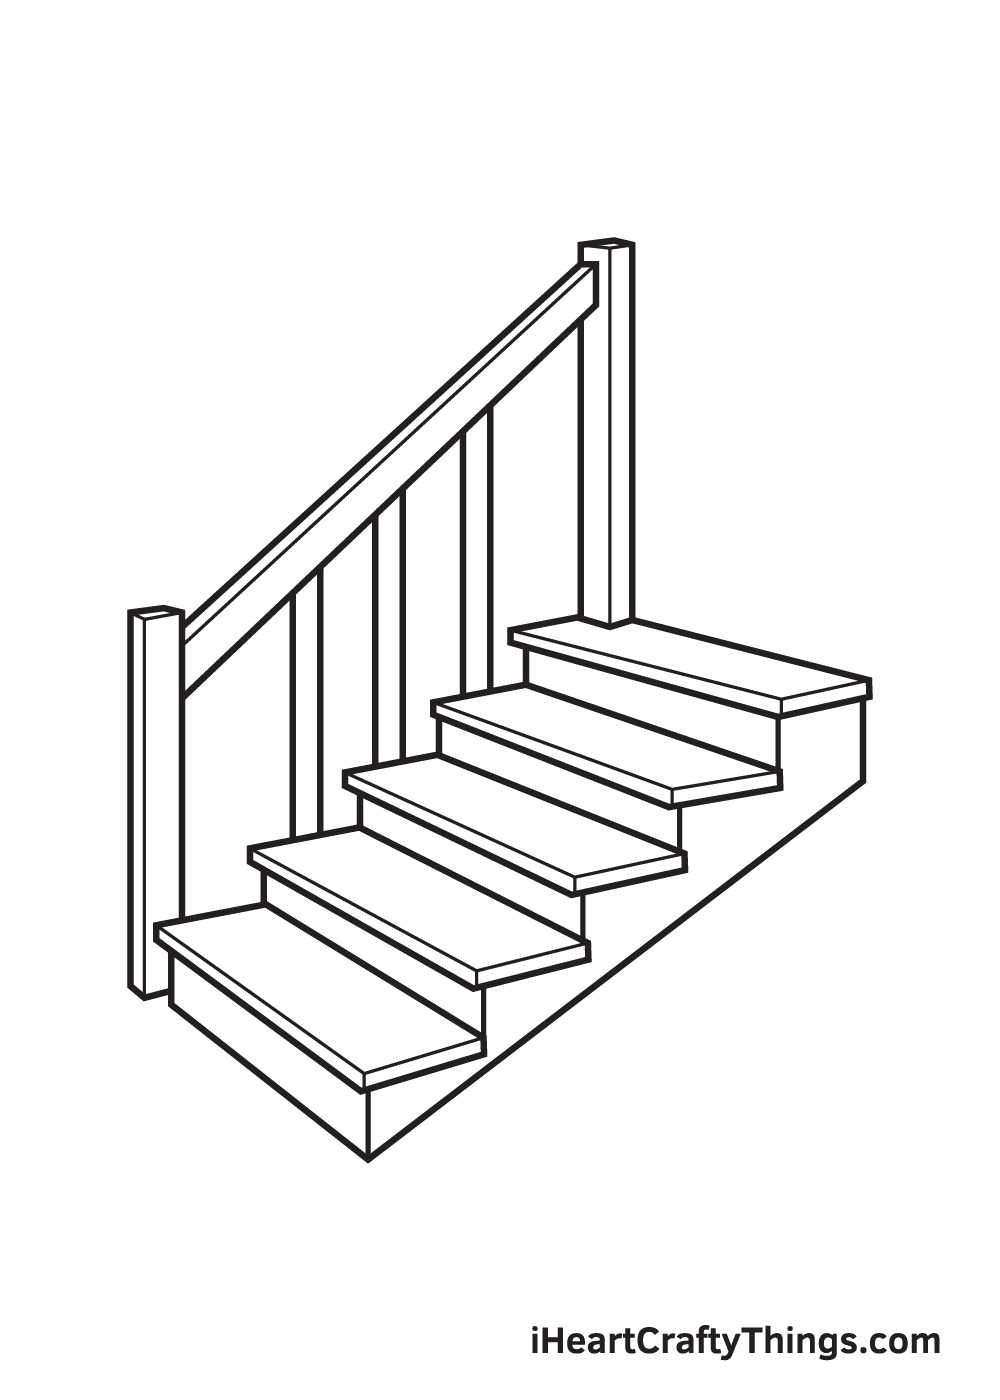
Describe three more poles in between the lower and upper central poles we drew previously in the seventh step. This creates the balusters, which serve as an additional support for the handrail.
Bear in mind that the balusters are thinner than the central poles.
There you accept it—we accept successfully drawn stairs! Now, it'southward finally time for the near exciting office, which is choosing the colors and coloring the stairs!
This is your opportunity to showcase your creative skills, especially your power to mix and match various colors.
Stairs exist in a wide range of colors, mainly because it tin can easily be painted with any color depending on the homeowner'due south preference.
Feel complimentary to use any color you like! We advise using a different color for the handrails and the poles to make the stairs vibrant and colorful!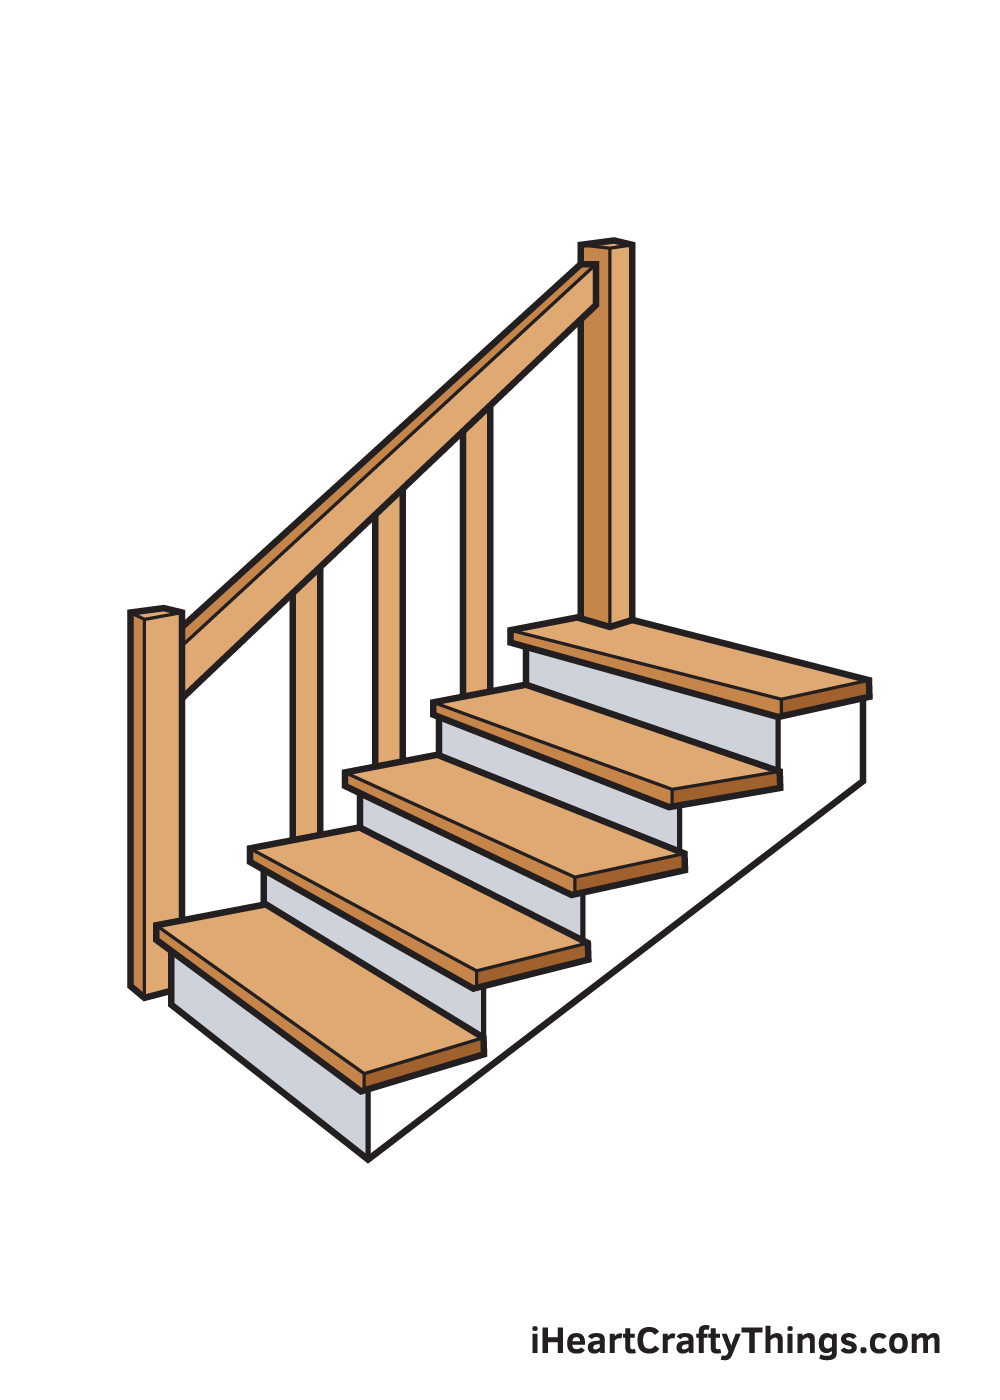
Your Stairs Drawing is Complete!
Hopefully, you have fun drawing stairs with the assistance of this step-by-step drawing tutorials. Now that you can draw the stairs, possibly you can depict an interior of a house with a staircase next?
The possibilities are endless once y'all've learned how to depict the stairs.
Don't forget to show off your masterpiece once you're drawing and coloring the stairs! Take a motion-picture show of your artwork and post it on our Facebook page and Pinterest.
Don't be embarrassed to share your drawing, we're certain it looks impressive!
We can't wait to meet your realistic stairs drawing!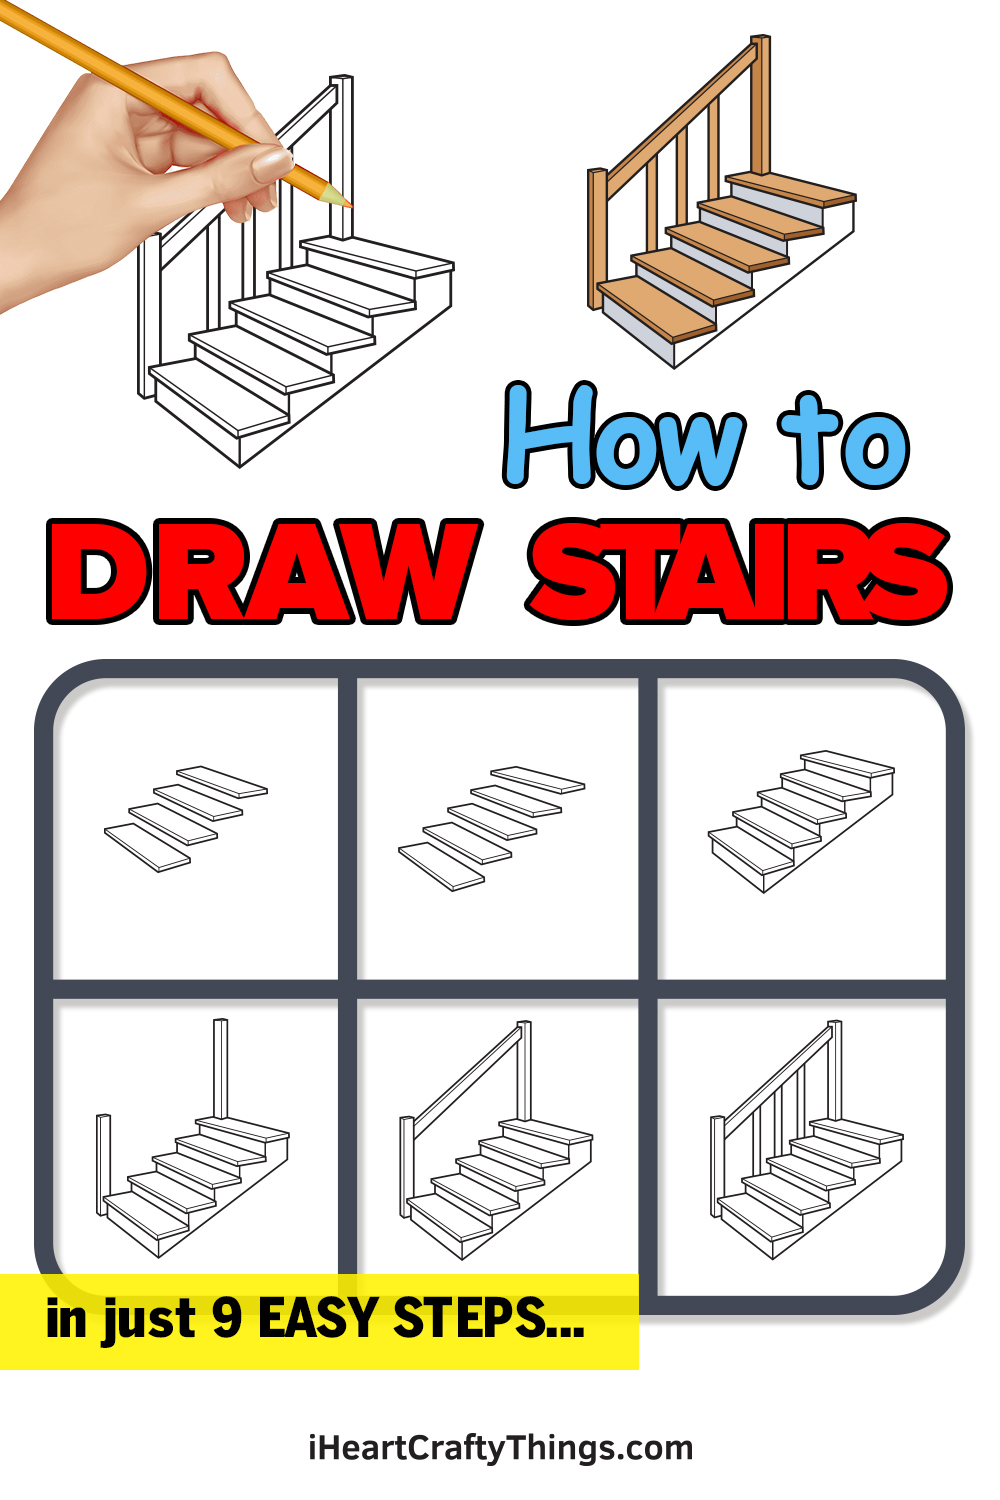

Source: https://iheartcraftythings.com/stairs-drawing.html
Posted by: lopezunpleted.blogspot.com
0 Response to "How To Draw Stairs From The Side"
Post a Comment